Do you ever come across a beautiful image of an exquisitely composed plate of food, on social media or in an advertisement, and wonder how it came out so perfect? I would like to offer a few tips revealing how they did it and how you can go from a novice food photographer to a seasoned pro.
1. The Prep Work
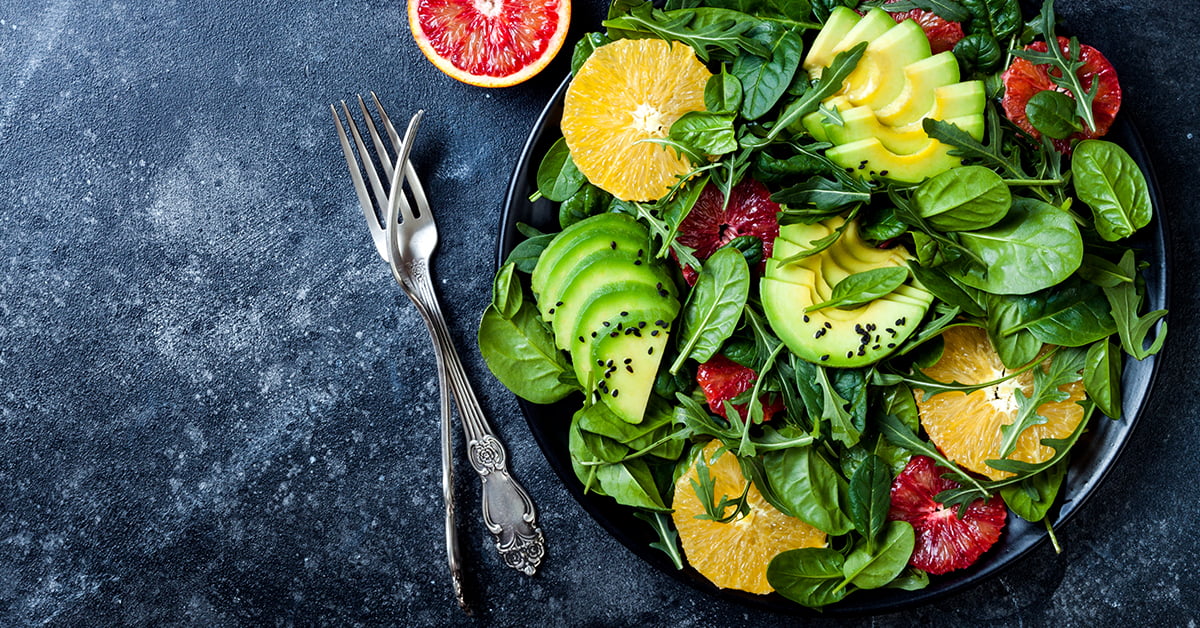
There are many things to consider when setting up a subject that is both appetizing and visually appealing.
Sketching and Composition
One of the first steps is to sketch out your idea. Composition is very important to the overall appeal of your image. There are several elements that make a good composition, but if you want your food to stand out, keeping the composition simple will maintain the focus on the star of your image–the food. Arrange the food neatly, give the subject some breathing room, and create lines and layers to lead the viewer’s eye around the image to create visual interest. Try decorating the scene with ingredients from your dish, or items that tell a story about what you’ve prepared. But keep in mind, simplicity is more effective than clutter.
Another wise tip before starting the photo session is to decide your shooting angles. This will keep you from having to readjust your items in order to achieve the desired look you are hoping to capture. Referencing great food photography that inspires you is another smart place to start. Try sites like Pinterest and Instagram. Study photos that fit your style and try to recreate them.
Color and Background
The color composition of your culinary creation is vital to the way you want the viewer to feel about your photograph. Using colors of a complementary scheme can evoke a sense of comfort and calmness. You can achieve the opposite effect by utilizing colors that contrast. This color scheme can evoke a sense of excitement and liveliness. When constructing the backgrounds or surroundings in your images, keep these elements more neutral in color. This helps the main subject stand out.
It’s also wise to invest in quality backgrounds. You can find a variety of materials to choose from at your local hardware store. Materials like wood, stone, ceramic tile, and other materials can give your photo a sense of familiarity and authenticity. When assembling your background and supporting elements, think about adding even layers of texture to add a level of sophistication.
Lighting and Shadows
Lighting can create an atmosphere, whether it’s bright and happy or dark and moody. Natural light is usually the ideal source for adding light and shadow. Natural light provides an accurate representation of colors you’re working with. Shooting near a large window is ideal, especially on a cloudy day. If it is not cloudy, diffuse the harsh sunlight by hanging a white bed sheet across the window. Artificial light tends to produce harsh shadows and cast an unwanted tinge of blue, orange, or yellow to your photograph. If you find yourself needing to shoot using artificial light, get a quality light source and a softbox for even lighting results. You can control the shadows by blocking light with black boards, reflecting light with white boards, or a combination of both. Try other items like aluminum lids or mirrors for different effects.
“Don’t think in food. Think in colors, shapes and textures” – Baerbel
Tricks and Secrets
There are clever ways to achieve the appearance of freshly cooked, mouth-watering food, even though it may have been sitting out for a while since it was prepared. Attempting to capture that perfect image can sometimes take some time. It’s important to have your subject maintain that freshly-made appearance. A few interesting examples are:
- Cardboard spacers or sponges to add height to your food.
- Motor oil as a syrup substitute. It doesn’t soak into the pancakes like real syrup will.
- Vegetable or olive oil to revive dry meat, making it look juicy again.
- Dish soap to add fizz back into your carbonated drinks.
- Submerged ramekins to keep garnishes elevated to the surface of your soups.
- Microwaved, wet cotton balls to give the appearance of steam coming off your “freshly cooked” entrée.
- Glycerin spray to keep produce looking fresh and vibrant.
2. The Cooking
Once you have your food displayed the way you want it for your photo session, it’s time to take the photos.
Angles
The most common shooting angles are straight from the front, at a slightly elevated angle, at roughly 25 degrees, or the popular overhead view. The angles you choose can affect the moods and emotions of the final product.
Lenses
I would recommend trying two different lenses. A Macro 90mm lens and the “nifty fifty” 50mm lens. It’s nice to be able to get close to your subject, but not too close. You’ll want to include some of the surroundings to capture more of the story you’re trying to tell.
Settings
It’s great advice to step away from the auto setting on your camera and try experimenting with some of the various manual settings available to you. The ISO should be set at somewhere between 200-400 on your DSLR camera for a finer grain. You can always add a grainy effect in the editing stage, if desired. A lower aperture setting will give you less objects in focus. You can start at f/3.2 and work your way up or down from there, depending on how much of a blurred background effect you prefer.
The shutter speed works hand-in-hand with the aperture and ISO to give your images the right amount of light. The darker the environment, the slower the shutter speed needed, but you run the risk of camera shake and unwanted blurriness. I highly recommend using a tripod whenever possible, giving you more latitude to utilize a slower speed, thereby letting in more light so that you can keep the ISO low as well. Lower ISO will produce a finer grain, higher quality image. Shooting Raw images will give you advantages in editing capabilities, but the file sizes are significantly larger—something to keep in mind.
3. The Clean-Up
Finally, we come to the end of the photo taking experience, where we attempt to clean up any flaws and enhance or subdue certain colors, textures, or elements, to produce that perfect image you set out to create.
There are many photo editing programs you can use, from Adobe Lightroom and Adobe Photoshop to handy phone apps for editing and adding filters to food images, like Foodie.
Photo editing programs help you selectively enhance or subdue elements of your photo by using masks. Masking and cloning can even produce copies of your subject to make it appear as if you made two or three or more pies, even though you actually took multiple pictures from different angles of only one pie. Keep in mind too that slight imperfections to your food can add character to your photograph, not hinder it. Not everything needs to be absolutely perfect.
I hope you’ve learned something, or many things, from this exploration into food photography. Happy shooting, and bon appétit!
Sources
https://iphonephotographyschool.com/food/
https://twolovesstudio.com/blog/99-food-photography-tips/
https://digital-photography-school.com/11-quick-food-photography-tips-to-make-mouth-watering-images/
https://digital-photography-school.com/8-steps-to-create-mouth-watering-food-photography/
https://medium.com/photography-secrets/food-photography-35a60c2f0d14