
At first glance, a customer’s journey may seem pretty simple. You offer an item and a customer buys it. Right? Well, maybe not. If a journey was that simple, a lot of companies would be making a lot more transactions today. Of course, much more goes into a customer’s journey than this. Customer journeys are unique, complex, and dynamic—and can look different for many types of users. There’s a well-known saying out there that states: a customer journey is like a snowflake, no two are truly the same.
Why Create Customer Journey Maps?
While it is true that no two user journeys are exactly the same, creating a journey map can help you wrap your head around common journeys that certain user groups experience.
From a customer’s perspective, they assume that you, as a company, know and remember their unique journey, including knowing exactly who they are and what they are looking for between multiple touchpoints. This is a given in today’s day and age. If your company fails to remember your users, then you’re one step behind the competition. Without a well-defined customer journey map, you’re unable to identify and solve for potential roadblocks like this.
A customer journey map is also a great artifact to share with other members of the team, outside of those working directly on the Customer Experience (CX) or User Experience (UX) team. This can help get members onboarded and on the same page as one another. It’s always a good idea to be working towards common goals as a team.
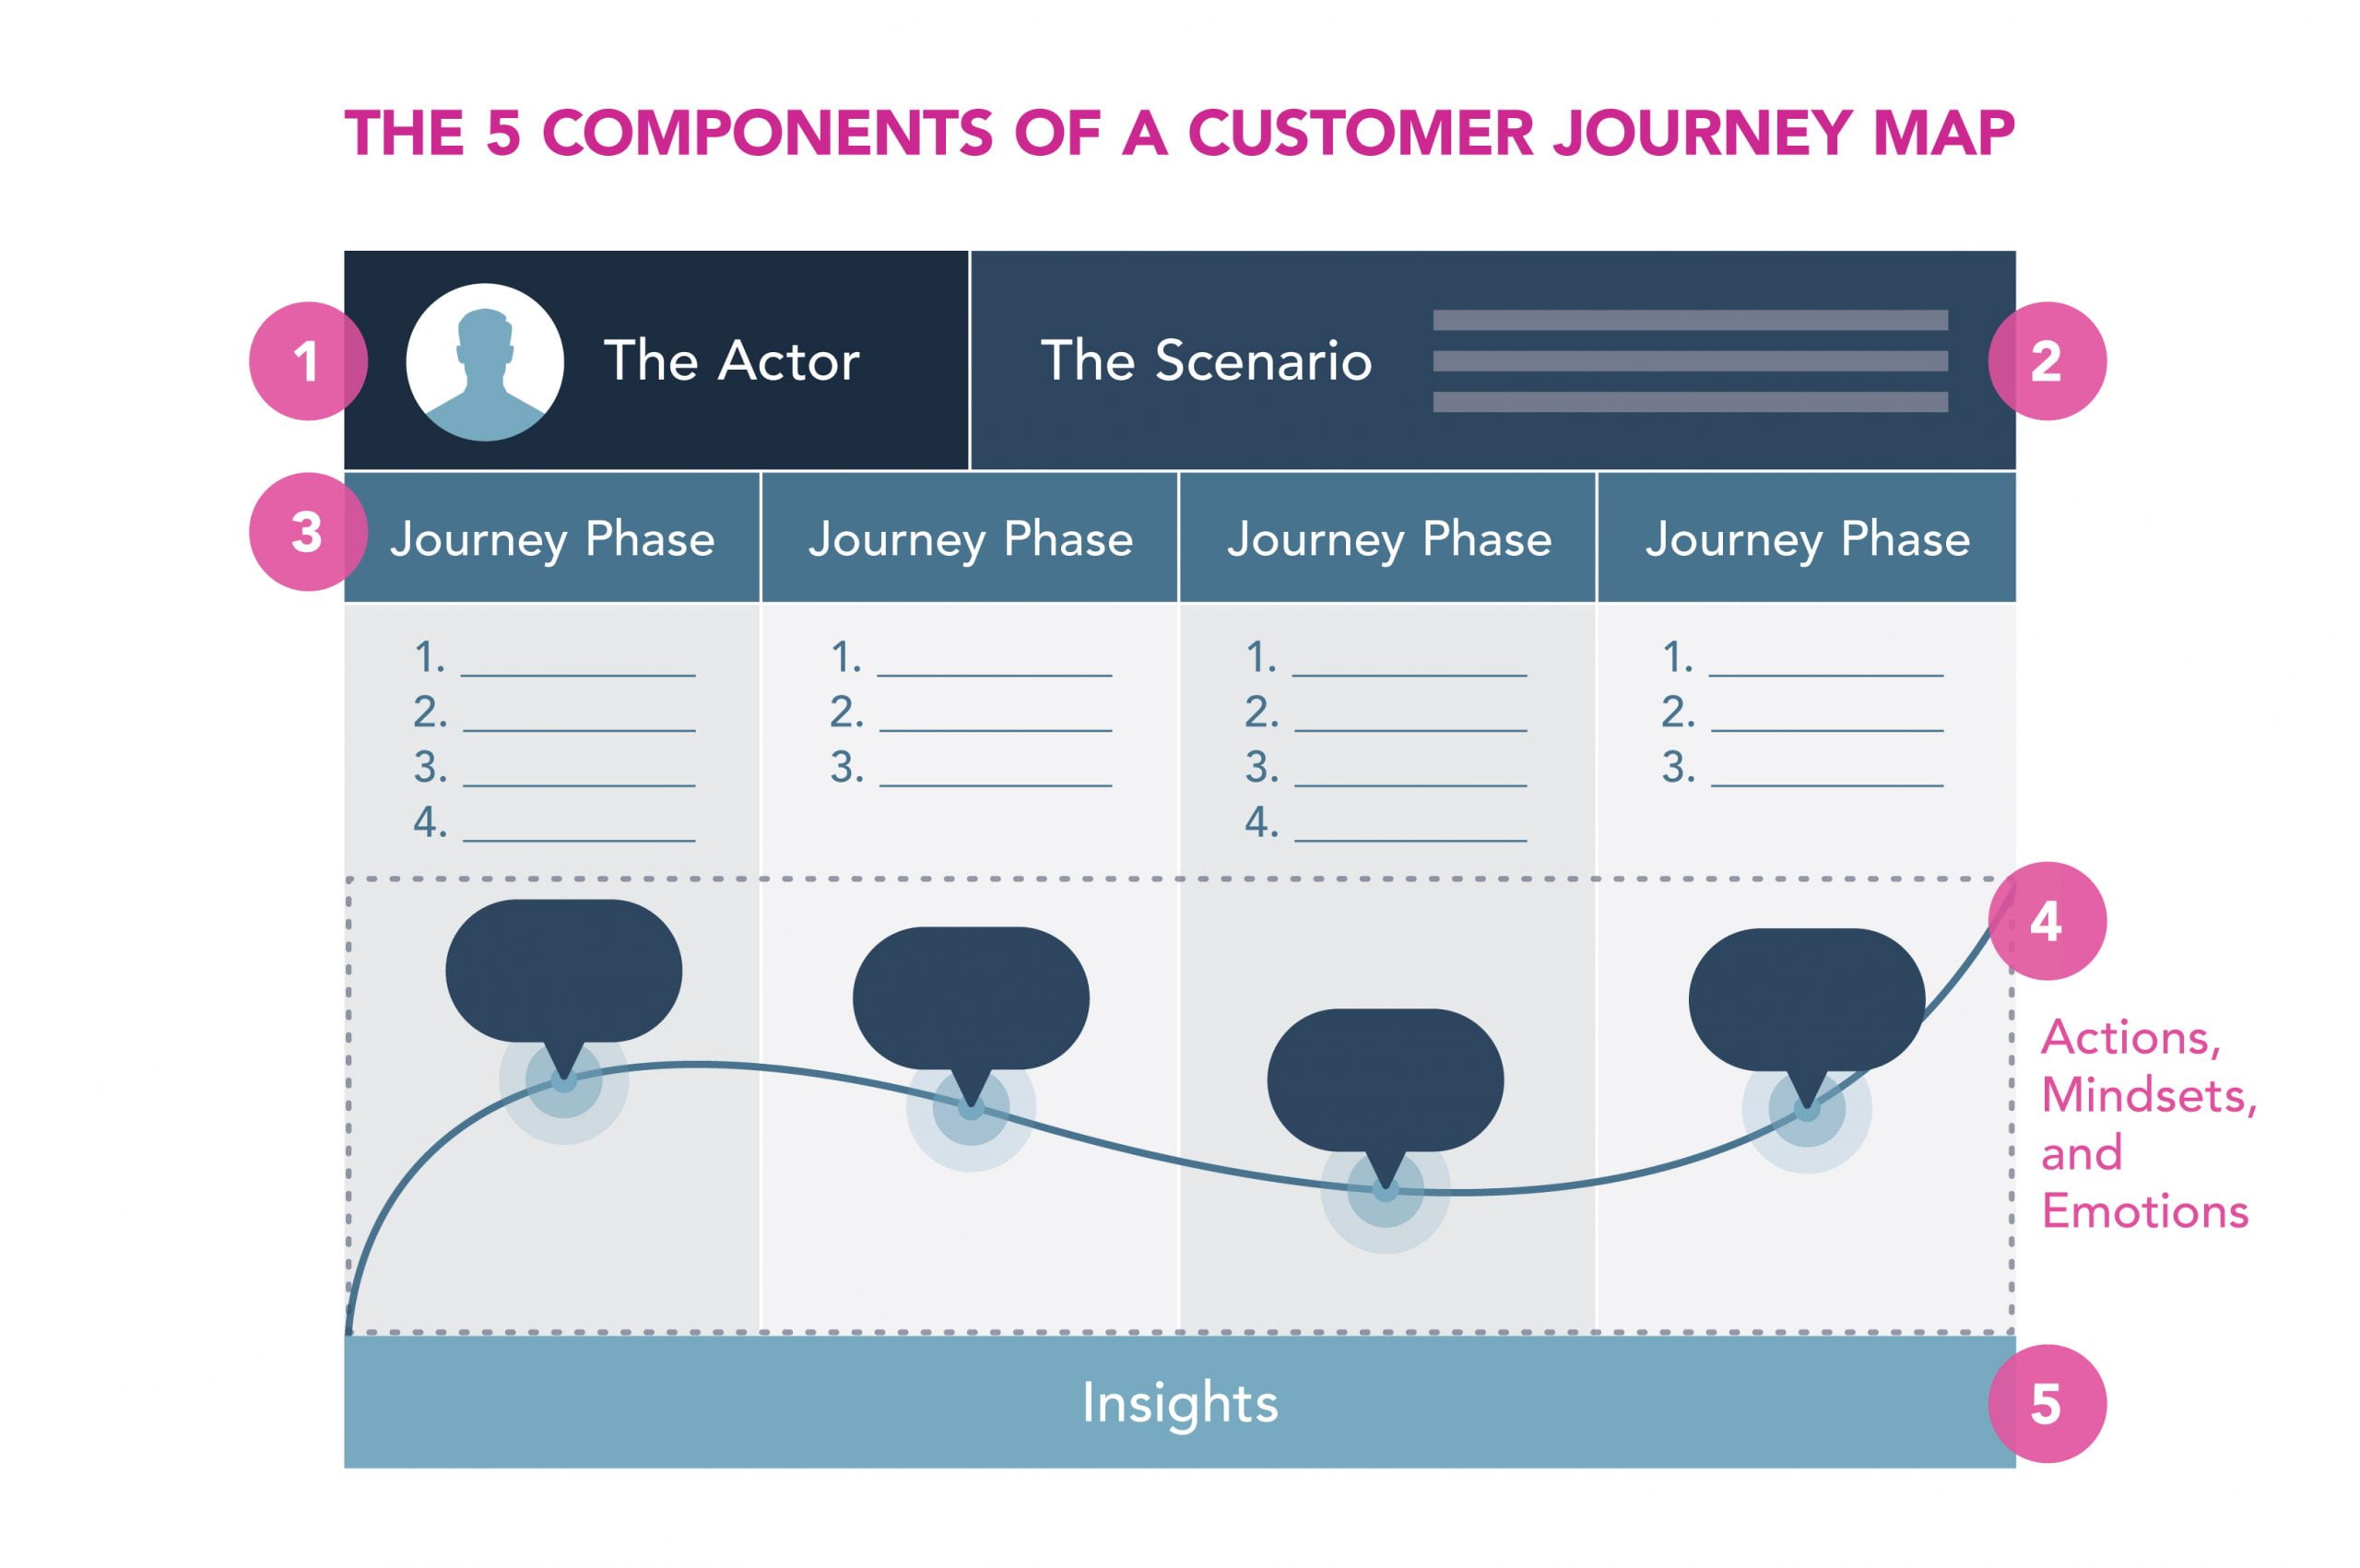
The 5 Components of a Journey Map
Based on our own experience with clients at Zion & Zion, our team’s training in Service Blueprinting in Arizona State University’s Services-MBA module, and our training with NN/g, one of the world’s leading user experience consulting firms, we’ve compiled the five key components of a journey map:
- The Actor
- The Scenario
- Journey Phases
- Actions, Mindsets, and Emotions
- Insights
There are many companies and websites out there that claim that there are dozens of pieces to consider when it comes to a customer journey map. However, above all else, we recommend using these five key components before layering on any additional information or metrics.
1. The Actor
The first piece to a journey map is the actor. This is the “who” of the map and can correlate to either a specific persona or audience segment that you’ve developed. Either way, it’s important to note that the actor should be a pre-established persona or segment derived from research. All too often journey maps get a bad rap because individuals assume that the actor is a fictitious character. When done correctly, this couldn’t be further from the truth.
In many cases, it’s common that you have multiple personas or audience segments. If so, we recommend starting with one individual persona or segment, perhaps one that you have the most insights on. You can always layer multiple personas on top of each other at the end to compare and contrast journeys. The key, though, is to create individual journey maps for each segment or persona, as to not to confuse the learnings from each map.
2. The Scenario
After your actor is clearly defined based on research, move onto your scenario. The scenario is the narrative that you’re placing your actor in. It’s best that your scenario is action or goal orientated to put purpose behind the overall experience and journey.
The common mistake in creating a scenario is that it usually either includes too much context, or conversely, not enough context at all. Try to aim for somewhere in the middle and only provide content that is relevant to the overall journey. You don’t want to muddy the waters with too much information but rather include important goal-based context to breathe life into the actor you’ve selected. As a good rule of thumb, before adding information to the scenario, think to yourself, is this information needed to understand any piece of the journey map? If not, it’s best to leave it off.
3. Journey Phases
Next, it’s time to define the journey phases. These are the high-level stages, typically located at the top of the journey map, that represent the stages the user goes through to accomplish the goal outlined in the scenario.
Just like everything else, it’s important that these surface from research and are representative of the actual journey a customer would take. An important gut-check would be to ensure that your journey phases don’t start or end with a purchase. To avoid this, think about the situation realistically and put yourself in the shoes of the customer. When was the last time that the first interaction you had with a company included making a purchase? What about the last interaction? In most cases, users take preliminary steps or concluding steps before and after making a purchase. This can include researching the company, researching the competition, tracking shipping, requesting an exchange, actually using the product itself, and more—the list could go on. These are all touchpoints to your company, so make sure you’re not ignoring these steps.
If you’re unsure where to start, consider this common set of journey phases: Research, Compare, Buy, and Use. This offers a great starting point and allows you to put pen to paper. You can always come back and refine these further if you identify additional journey phases later on.
4. Actions, Mindsets, and Emotions
Now that the framework of your journey map is laid out and ready to go, it’s time to get into the actions, mindsets, and emotions of your journey. This represents what your user is actually doing, thinking, and feeling. It’s arguably the most important component to a customer journey map, so be sure to spend some time really diving into the data here.
Actions
The easiest place to begin your work within this component is with the actions. What are your users doing? Include the good, the bad, and the neutral-based actions to get a holistic view.
Mindsets
After you’ve reported on the actions, contextualize them by adding in the user’s thoughts, or in other words, their mindsets. This can either be derived from interviews or prior research or can be done based on assumptions. For example, if an action is cumbersome or requires a lot of time, it would be safe to assume that the user would be thinking “this is taking too long” or “I am frustrated.” Don’t be afraid to make some assumptions here, as long as they’re logical and intuitive.
Emotions
Finally, draw out the highs and the lows of the experience by recording the emotions. There are a lot of ways to represent emotions on a customer journey map, however, a common and useful way to do so is to draw a line that angles horizontally across the map. This line should ebb and flow, representing the highs and the lows of the emotional experience. Creating this visualization will help pinpoint user pain points and emotional highs that you can capitalize on later.
As you work your way through this piece of your journey map, it’s important to remind yourself that your goal isn’t to create a long list of every little thing your user does, thinks, or feels. A customer journey map isn’t an action log, so make sure you’re focusing in on what’s important and/or unique to the experience you’re mapping.
5. Insights
The last and final step to creating a customer journey map is defining your insights. This is typically a forgotten step, but it’s one of the most important pieces. This represents the learnings from the experience and is the area where you can define what opportunities lay ahead for your company, project, or department. Excluding insights and opportunities from a customer journey map would be equivalent to presenting research without the analysis, recommendations, or solutions. It may look professional and feel impactful, but it isn’t very helpful without defining what’s next.
When recording your insights, make sure they are clear and intuitive to someone that may not be as familiar with the experience as you are. Imagine sharing your journey map with your team or an important stakeholder. These individuals should be able to look at your map and quickly digest what next steps could look like.
Piecing It All Together
With these five key components, you’ll be well on your way to creating a well-structured and well-organized customer journey map. After piecing your first map together, remember to share it with your team so you’re all working towards a common goal. And, don’t forget to create additional maps for your various personas and audience segments. Creating a map for each individual segment can help you get a holistic view of your company’s overall customer experience.
Happy journey mapping!