
The Benefits of Developing Locally with WordPress and MAMP
Whether you are a beginner or experienced developer, it is safe to say that developing locally will save you many unnecessary headaches. It is good practice to stay away from production servers until you are ready to go live, and even if a staging server is available, working on a local server will speed up your development and troubleshooting time and will allow you to use some really cool tools in the process. For instance, WordPress—the popular Content Management System (CMS), Blogging Tool, Web Platform, Framework—or any of the many labels this piece of software has.
A combination of /WordPress and /MAMP will allow you to create web applications with ease and control. Both WordPress and MAMP are easy to install, and in a matter of minutes, you will be ready to dive into code and transform your next cool idea into a fully loaded web app.
What is this magical “WordPress & MAMP” of which you speak?
WordPress is the cool kid of CMSs, and as of August 2013, it controls 22.0% of the top 10 million websites. You could say that it’s pretty popular. It is mainly known for being a great blogging tool, but that just scratches the surface of the possibilities it is capable of. If you are interested in learning more about all that WordPress has to offer, check out Why to use WordPress.
Now let’s talk about MAMP, which stands for Mac, Apache, MySQL and PHP. This awesome application allows any developer to create a server environment in their Mac computer with ease. The other parts that make MAMP so cool are present in almost every server out there, whether it is /proprietary or from a /hosting provider.
Apache is an open source http web server that contains many useful modules like SSL, Webdav, Auth, Cache, etc. This is the part of MAMP that turns your computer into a fully functioning server. Another useful aspect of Apache is that it is one of the most popular servers out there. That means there’s a great chance that the production server for your site will be compatible with your MAMP setup.
The last two parts of MAMP are MySQL and PHP. Any web application needs a database, and MAMP allows us to easily manage that with its MySQL feature, which is the most commonly used relational database system on the web. PHP is the most commonly used programming language for creating websites. As a developer, you will use PHP to control your website’s interaction with its server and database.
If you feel a bit overwhelmed with this technical information, don’t worry, MAMP makes server configuration really simple. Basically, by installing MAMP you will be able to run a server that has all of these cool features with just the click of a button. Boom!
Let’s do this then. Show me the magic.
Installing WordPress and MAMP is a breeze. Let’s go through MAMP installation first and then through the WordPress “Famous 5 Minute Install.”
1. MAMP Installation
First, go to the /MAMP site and download the latest version of the software. Keep in mind that you need to be running Mac OS 10.6.6 or later. After that, go through the easy installation process and launch the app.
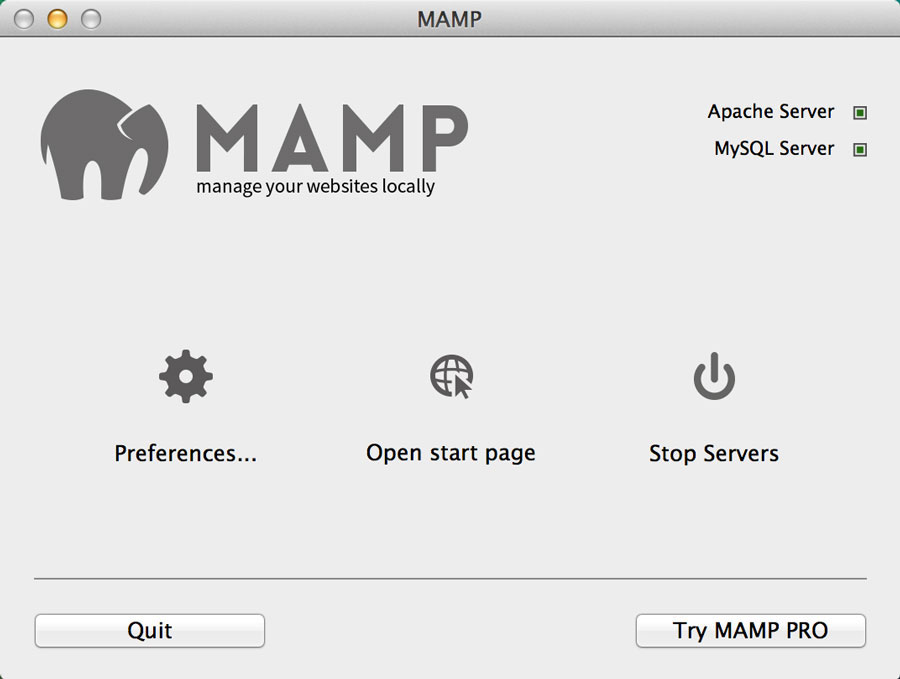
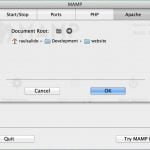
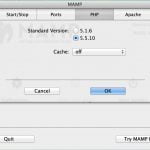
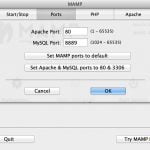
Now let’s take the tour. You will find all needed configuration under the “Preferences” section. The “Apache” tab handles the location in which MAMP will run its local server. This is where you will place all of the source files for your next project. The “PHP” tab allows you to choose from different versions of the language. The “Ports” tab controls which ports will be used for Apache and MySQL (Default values are fine here unless you are interested in virtual hosts). Finally, “Start/Stop” handles basic configuration for your start and stop actions.
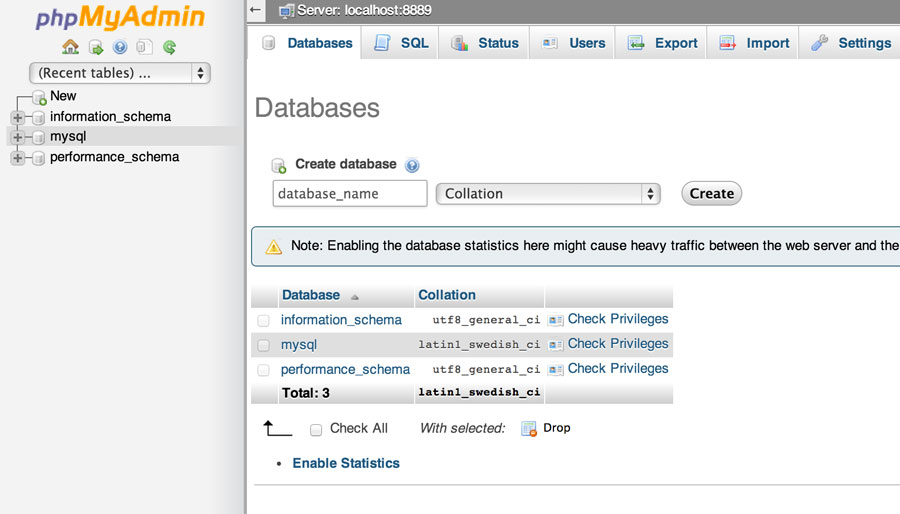
As you may have noticed, MAMP opens its “Start Page” as a default when launching. The main benefit of having this page is its phpMyAdmin interface (if this page doesn’t appear, just click the “Open start page” button on MAMP’s main screen). PhpMyAdmin lets you manage/create databases and its users.
And that is pretty much it. MAMP is a real powerful and easy-to-use tool for local development. Now start your server and get your hands dirty with code!
2. WordPress Installation
Now that MAMP is up and running, let’s go over the easy WordPress “5 Minute Install.” First, go to the /WordPress site and download the latest stable version. Open the /.zip file and move all of the files to the active directory of your local server (i.e. the directory you pointed Apache to). Before you continue to move forward on your installation, you need to have an available database and user for WordPress. Don’t worry; creating them is really easy too. Open your MAMP “phpMyAdmin” interface and click the “Databases” tab at the top left corner of the main section. Type the name of your new database inside the field and click create. That’s it, easy breezy.
A user with writing privileges is needed in order to install WordPress as well, so you can go ahead and create one in the “Users” tab located three positions after the “Databases” tab. If you don’t need a specific user for this database, you can always just use the “root” user which is created when MAMP is installed. If that’s the case, then don’t worry about creating new users. Now that we have a database and a user, we can move forward!
Go back to your source files and open the file called “wp-config-sample.php.” Update its configuration fields to match the ones from your newly created database. The required constants to update are the ones shown below. Make sure that the info in them matches your database and user.
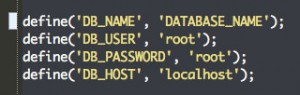
When you’re done editing the file, save and replace it as “wp-config.php.” We are almost there.
WordPress makes it super easy to run installation as well. Just go to your preferred browser and reach your local server by typing “localhost.” This will trigger the WordPress installation. If your configuration file was renamed and the configuration constants match the databases and users, WordPress will install successfully. You’re done. You are now running a local server with a WordPress installation in it. Cool stuff, cool stuff indeed!
Time’s up. Wrap it up, son!
Now that you’ve learned how to install MAMP and WordPress, the possibilities are endless.
Benefits of Developing Locally
A great benefit of developing locally is the ability to play around and not worry about breaking stuff. That is something that, as a developer, you will truly appreciate. Also, that means less people come to you raging havoc because “their site is broken.” So play around, break stuff, fix stuff, and have fun. Mainly, just keep experimenting and learning new things; that’s what Web Development is all about.