
Cross browser testing is an imperative step in getting your site ready to launch. Cross browser testing checks a site’s compatibility across multiple browsers and devices. This process ensures the user has a seamless experience, no matter how they access your site. Without some structure, this process can quickly become repetitive and tedious. This article seeks to eliminate those hurdles with an effective and efficient process.
Before defining our customized cross browser strategy, it’s important to know why you’ll see discrepancies between various browsers. Each browser uses its own rendering engine. For example, Chrome uses Blink, while Firefox uses Gecko. Without consistent standards, there will inevitably be differences between browsers. As developers, it’s crucial to educate ourselves on browser support and use a customized cross browser strategy as a guide when considering whether to introduce new and experimental features.
Customize to Your Audience
Ideally, you would define a customized cross browser strategy before you even begin development. To do so, you’ll need to gather information about your audience and how they access your site. For this, use an analytics tool like Google Analytics.
If you don’t have access to information about your audience, I would suggest looking at browser usage statistics to gain insights. Without any audience data, the most logical decision would be to support the latest versions from browsers like Chrome, Safari, Firefox, Edge, and Internet Explorer.
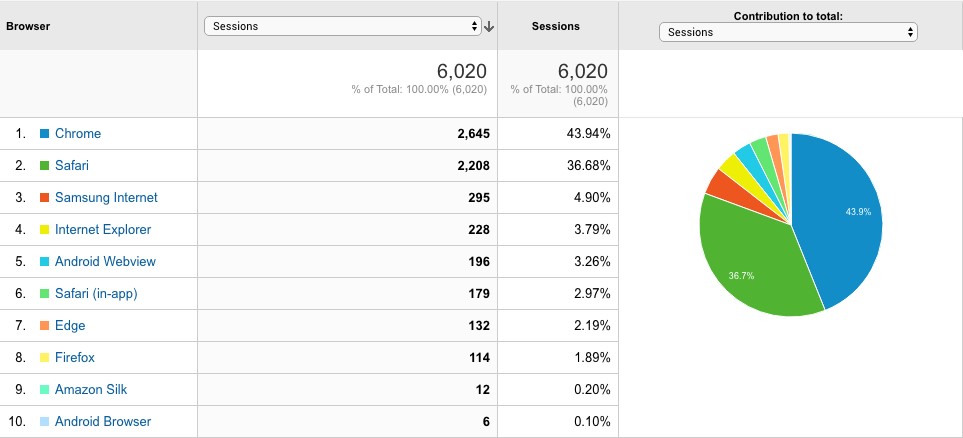
I’ll walk you through how to retrieve the necessary information in Google Analytics. We will access the Audience report. Our areas of focus will be Browser & OS and Devices.


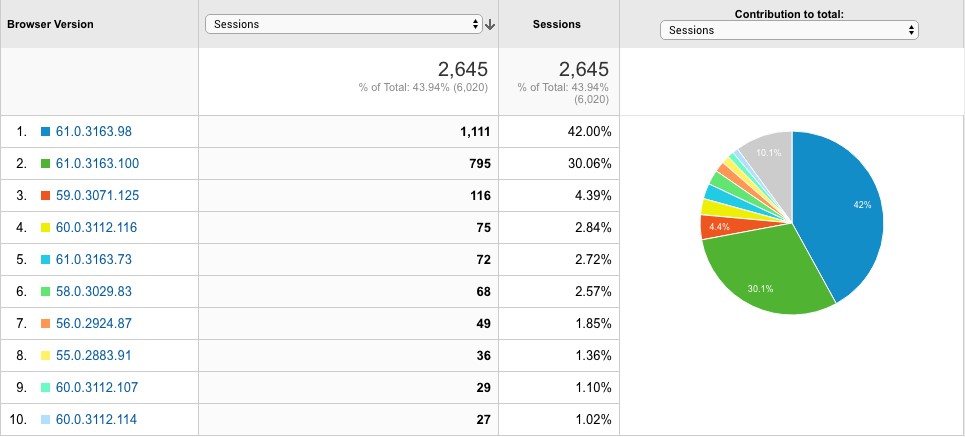
Browser & OS provides you with not only the most common browsers used to access your site, but also the browser version which will be important when you start cross browser testing.
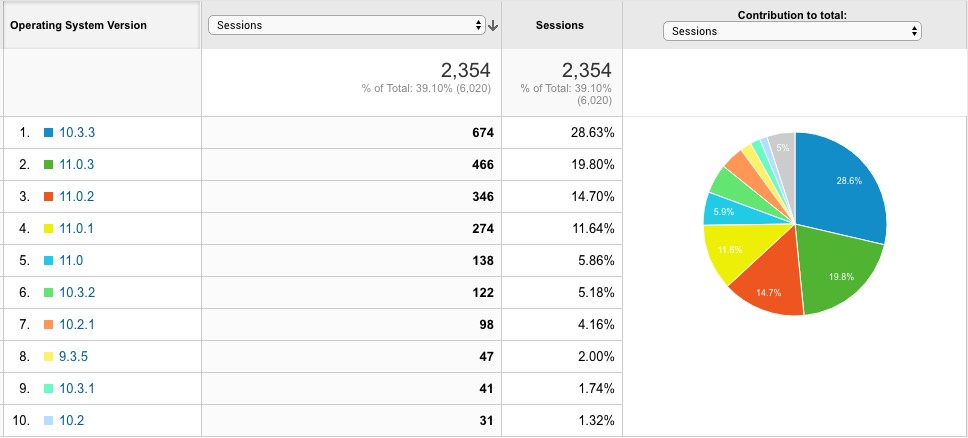
Devices will provide you with what devices are most commonly used to access your site. Perhaps more important than the actual devices themselves are the devices’ operating system and its version. This information can be accessed by changing the primary dimension to Operating System. From there, you can see the OS versions. This will be particularly useful when you do cross browser testing for mobile.
This browser and device data is more useful in eliminating which browser versions you do not want support, such as IE8. If your audience was primarily composed of IE8 users, not a likely scenario with 0.27% global usage, you might want to reconsider your decision to not support this browser version. Overview the data carefully to determine which browsers and devices should be included during the testing phase.
Prioritizing Pages and Components
When cross browser testing, your goal should be to test the least number of pages while covering the most amount of the site. This might sound counterintuitive since you want to ensure that all pages are displaying correctly, but by doing this, you’re simply reducing the amount of work required to cover the entire site.
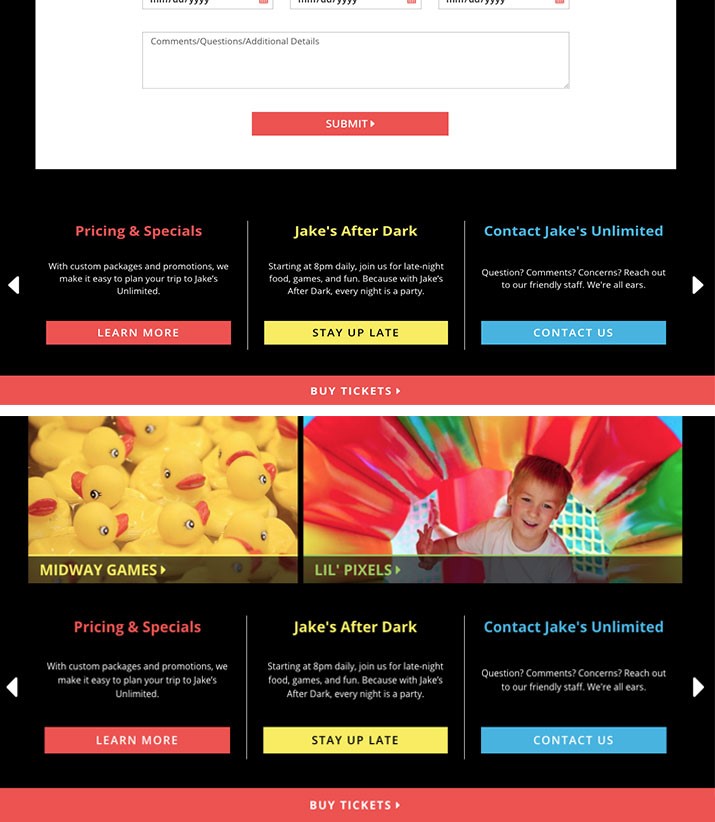
So, the question becomes how do you accomplish this goal? First, you need to assess your site. You must review all the pages and see what they have in common. Are there shared page templates? Are there shared page components like side navigations or callouts? You can significantly reduce the amount of cross browser testing needed by reducing your site down to page templates and components. Of course, some page templates and components will be unique and will have to tested individually.
You should test each page template, unique or shared. But, for each new page tested you can ignore any previously tested components like side navigations or callouts. It’s important to note that this style of testing assumes that shared components are pulling from the same code base. This testing strategy reduces the number of elements to test as you move through the site. It ensures that a change you make won’t change anything you’ve previously tested. For example, if your side navigation wasn’t displaying correctly on the Blog page when you move onto the About Us page that also uses this component, the issue should no longer remain. You shouldn’t wait to resolve the issue until the About Us page since you already encountered the issue on the Blog page. This tactic essentially limits any backtracking.
In addition, I suggest always starting with the homepage. This might seem like no brainer, but the homepage is more than just your site’s first impression. The homepage contains your main navigation and footer. These important elements will be on every page so this is the perfect opportunity to make sure those are displaying and functioning properly before jumping into other pages. Once the main navigation and footer have been completely tested, you can focus on the main content of the page going forward. Go forwards, not backwards with your testing.
How to Test Your Site
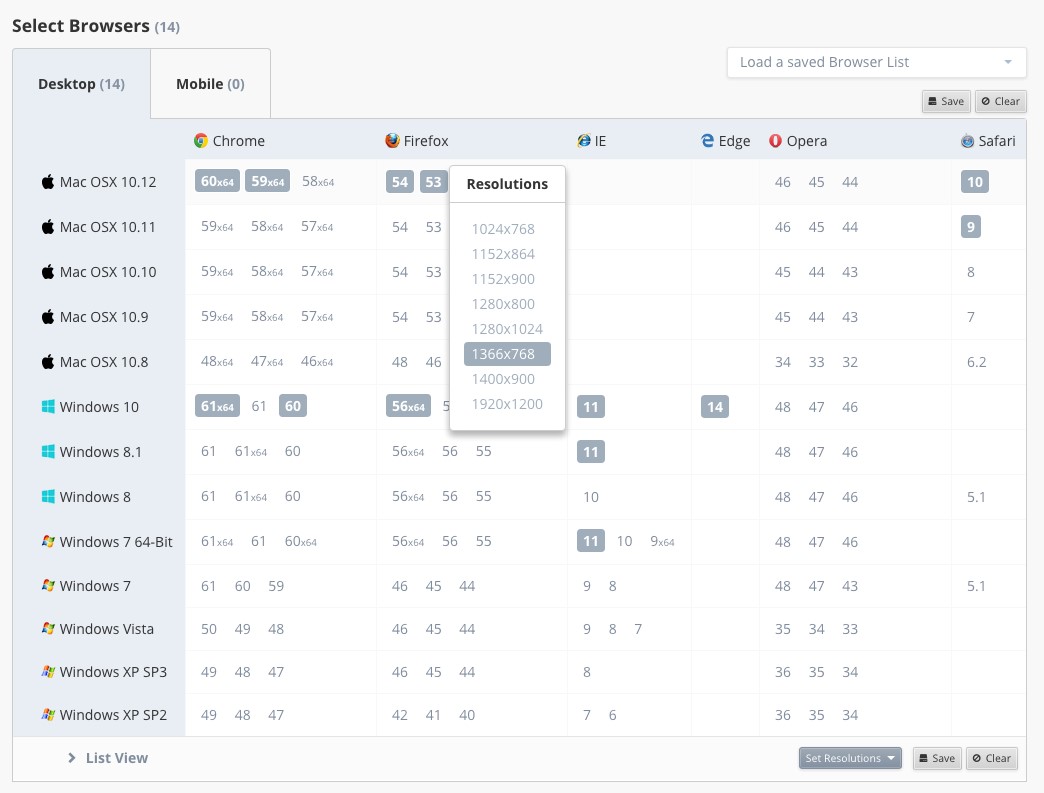
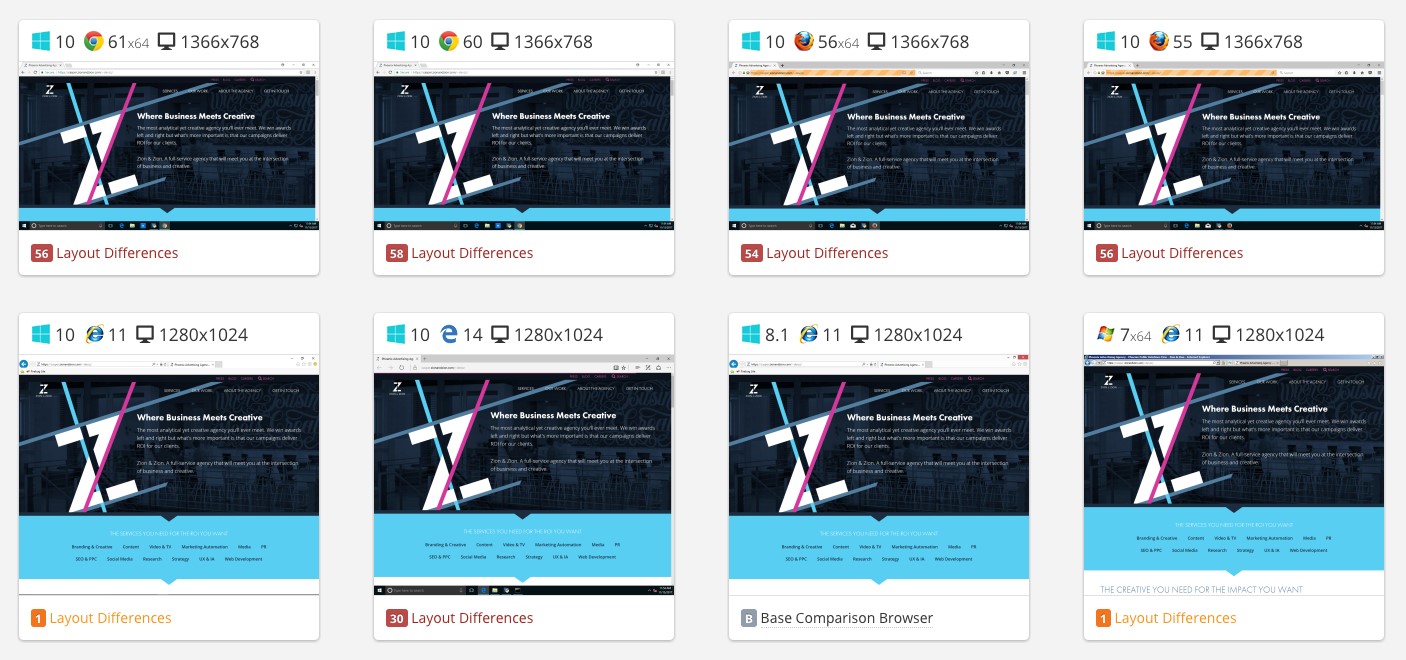
Now to testing the site! There are a lot of available cross browser testing tools out there. From free to paid, find the tool that works best for you. For the purposes of this article, I will be using CrossBrowserTesting and will specifically use live testing and screenshot testing tools. The screenshot tool previews the site in multiple browsers at once, while the live testing tools allows me to individually test and interact with my site on a browser. The screenshot tool is more time effective, but the live testing tool is necessary because you can debug issues you encounter directly within the browser, using its native development tool.
Another great feature of CrossBrowserTesting is their automation tool. Sometimes a functionality issue can be hidden within a screenshot. This is where automation comes in. I use the browser extension Selenium Builder. This extension tracks all the actions performed on the site and produces a script that gets imported into CrossBrowserTesting. With that script, you can run a screenshot test that will provide screenshots of the final action from the script.
For example, imagine you want to test the filters on your Blog page. For the automation test, you would perform the actions, most likely clicking a link, necessary to trigger the filters. Once this is complete, screenshots will be produced showing the results of the selected filter. These automated screenshots show you whether the appropriate results were filtered correctly. If so, you can move onto the next task in your cross browser testing. Otherwise, the filter component will need to be debugged.
Dealing with Errors
Speaking of debugging, errors are unavoidable during cross browser testing. As developers, you may not always know the solution. When this happens, turn to online resources to shed some light on the situation. One of my favorite resources is caniuse.com. It shows you browser support for CSS, HTML, SVG, and JS features along with listing known issues for these features which can be particularly useful. When everything else fails, there is always Stackoverflow. Stackoverflow is an online community of novice and expert developers that covers every development topic imaginable. If you have a question about something, it probably has already been answered on there.
Conclusion
Cross browser testing is one of the last steps in getting your site launch ready, which is why it is important to dedicate time to this. However, this process does not need to be daunting. You can simplify this process by identifying the appropriate browsers and devices for your audience, assessing your site’s pages, and using the correct tools to test your site. When strategically planned, cross browser testing can be done in an efficient and effective manner.