
If you’re a social media professional or a business owner trying to navigate the world of Facebook Business Pages, the following situations may sound familiar.
- There are rogue location Pages set up that you don’t have access to. You need to manage your brand and respond to users commenting on them.
- You have more than one Page set up for the same business, but don’t want to lose any followers by deleting one of them.
- You have multiple location Pages for a business, but none of them are set up under your main Page.
There are many variations of the above scenarios, and unfortunately, figuring out the solutions on your own can be a struggle with Facebook’s limited guidance. In this article, I’ll help you to learn the nuances, workarounds, and strategies for implementing the three major things you’ll inevitably run into when managing Facebook Business Pages: Page Claiming, Page Merging, and Page Location Setup. Let’s get to spring cleaning!
Facebook Page Claiming
Let’s kick things off with Facebook Page Claiming. If you’re in this situation, it means you don’t have access to a specific Facebook Page for your business, but want it. When it comes to Page Claiming, there are two different angles—claiming Unofficial Pages and claiming Official Pages. Unofficial Pages are Pages created by Facebook that no one manages. They’re created because someone checked into a place that didn’t already have a Page or location associated with it. Official Pages are claimed Pages that have people tied to the Page managing it behind the scenes (admins), actively or inactively.


Claiming an Unofficial Facebook Page
- When on the Unofficial Facebook Page, click “Is this your business?” on the top right.
- If you want to merge the page into a verified Page you already manage, select that option and follow the prompts Facebook gives you.
- If your Page isn’t verified or that option isn’t available for you, you’ll move forward with the “Claim and verify with a phone call or documents” option.
- You can opt to have Facebook call the number listed on the Page and then you can enter the verification code. Or, you can verify the Page with a business document like a utility bill or a business license.
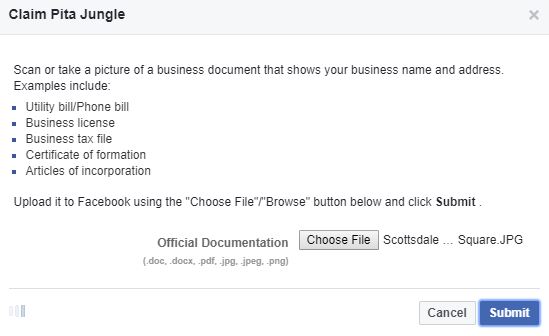
Verification Document Options - If you opt to verify with a document, there is a wait time for a Facebook rep to review and approve the document. I’ve found that they get back to me within the day, or by the next day if I submit the request in the afternoon. Note: Facebook is buggy here and it may seem like nothing happened or it is continuously loading when you click submit. Most likely, your request did go through. Exit out of the status window and visit your Support Inbox to verify—you’ll see your case to claim a place.
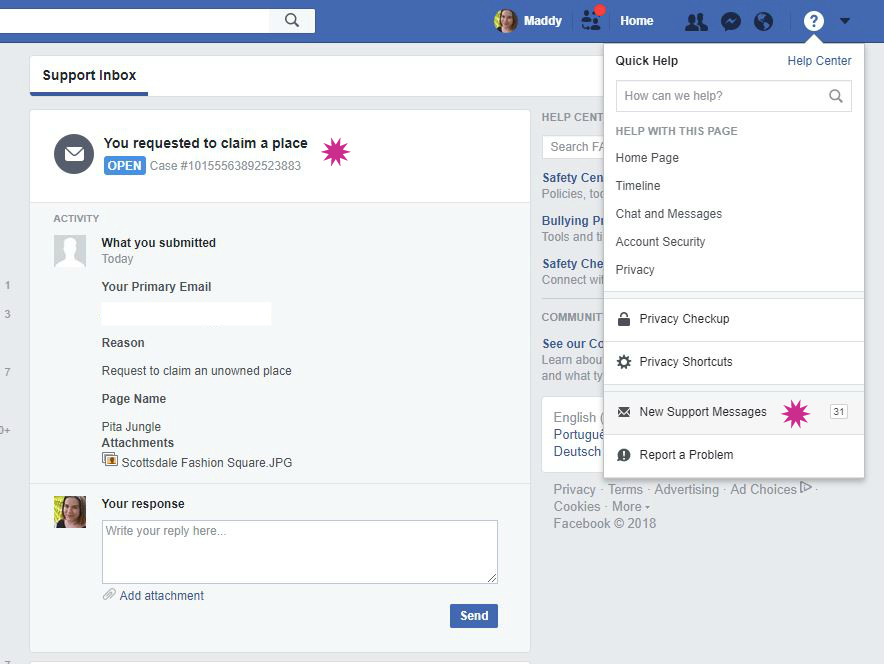
Accessing Your Support Inbox - If Facebook doesn’t approve your document, you can respond to the email you receive or support message and attach a new document. Typically, they don’t accept anything that could be publicly accessible, like a liquor license.
- Once approved, you’ll have access to the Page. You can then start actively updating it, deleting it, adding it as a location Page to an existing Page, or merging it into an existing Page. More on the last two options later in this guide.
Claiming an Official Facebook Page
Did someone create a Page for your business that you don’t have access to? Facebook’s official statement on this situation is, “Facebook is not in a position to settle disputes regarding admin roles. We cannot grant you a role on a Page and we cannot change your role on a Page.”
If you’re finding yourself in this predicament, here are some things you can try:
- Communicate with your team or whomever may have access to the Page and see if they can add you to it.
- Request the Page’s removal by reporting a violation or infringement of your rights.
- As a last resort, you can create a new Page.
Facebook Page Merging
Facebook Page Merging is a handy tool when you want to combine two or more Pages into one. You may want to merge when multiple Pages are set up for the same business or business location, or when you claim an Unofficial Page and want to merge it into a Page you manage. However, there are restrictions and steps to take to be able to merge Pages, so let’s dive right in.
Merging Requirements
You’ll be able to merge two Pages if you meet the below requirements:
- You have admin-level access to both Pages.
- The Pages have similar names and represent the same thing.
- The Pages have the same address if they have a physical location.
- If one of the Pages is in a Business Manager, the other must be added to it as well.
I’ll cover some workarounds to these requirements after we go over the merging process.
Merging Process
Here’s how to merge Facebook Pages:
- Visit com/pages/merge or business.facebook.com/pages/merge for pages in Business Managers.
- Select the two Pages you’d like to merge. Then, select “Continue.”
- Select the Page you’ll be keeping. The other Page will be removed—note the important considerations in the next section.
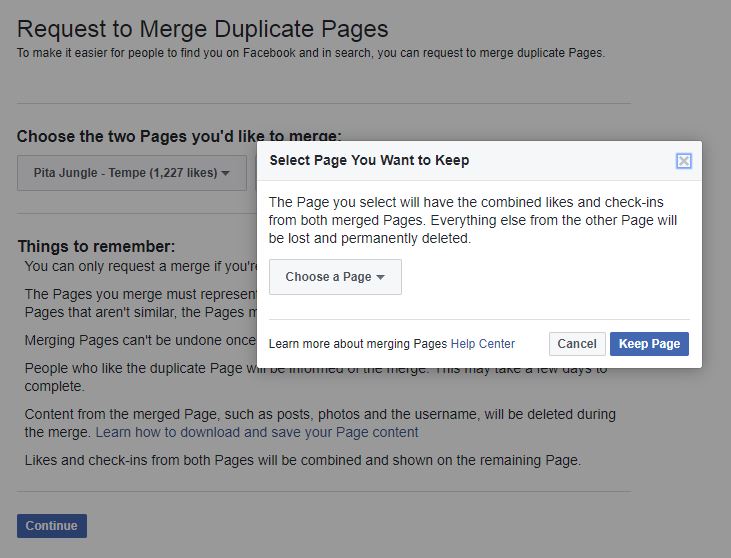
Page Merge Process - Facebook will confirm which Page you keep and which will be removed, then finish the merge request.
- Keep an eye on your Pages. You should notice the merge completed within a few hours or less.
Important Considerations
It’s very important to note that the Page you merge will only transfer check-ins and likes to the Page that you keep.
The old Page that’s merged won’t transfer posts, photos, reviews, nor the username of the Page to the Page you keep—these will all be removed. The Page you aren’t keeping will also not be able to be unmerged.
Please merge cautiously!
Merging Problems and Solutions
Here are some common problems and solutions that come with merging Facebook Pages:
Problem: The names aren’t similar enough to merge.
Solution 1: Change the name gradually to get it close enough.
- Visit the About section on your Page.
- Click “Edit” next to your Page Name.
- The wait time between name changes is seven days.
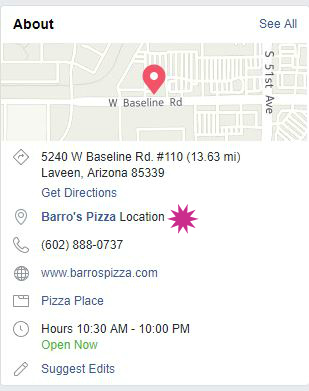
Solution 2: On the About Page, when you don’t have access to a Page, you can click “Suggest Edits” and then suggest an edit to the Page name.
- Have employees suggest a name change on your Page that matches the other Page.
- With enough suggestions, Facebook could send you a notification to accept the update to change your Page name.
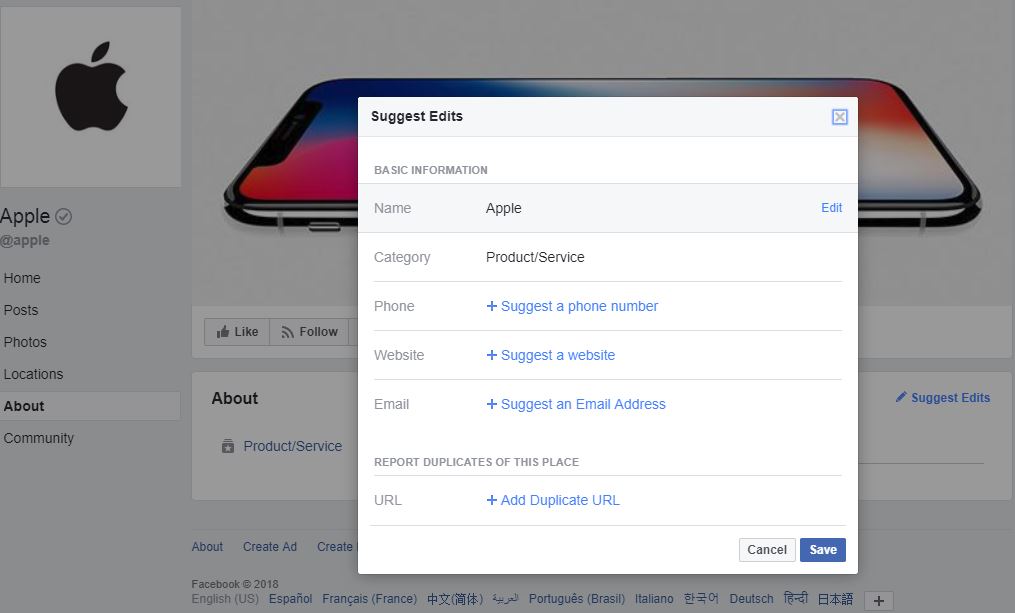
Suggesting Edits to a Page Problem: You’re trying to merge with a location Page set up under a parent (main) Page and it’s not showing up as an option to merge into.
Solution: Even though you’re an inherited admin from the parent Page, add yourself as an additional admin to the location Page itself.
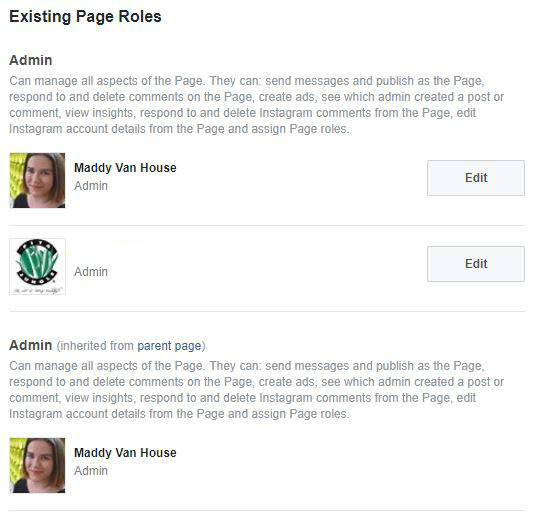
- Now you will see the location Page as an option in the Page Merge window.
- Once you complete the merge and no longer wish to have the location Page show up in your Page list, you can remove your added admin access. Doing so will still keep your inherited admin access to the parent Page.
Facebook Page Location Setup
When managing a business with multiple locations, setting up Facebook Locations correctly is a wonderful experience when done from the start, but can be a confusing process when these locations are already set up as their own individual Business Pages. Learn more about setting up location Pages and their benefits in the rest of this guide.
The Basics of Facebook Locations
If you weren’t aware, Facebook Locations (also called Places, but I’ll keep the term Locations here) are their own Pages on Facebook set up under one main Business Page (called the parent Page). Think of the parent Page as the umbrella or hub of all information and content for your business on Facebook, and the Locations Pages branching off from the parent Page, representing the actual different locations for your business.
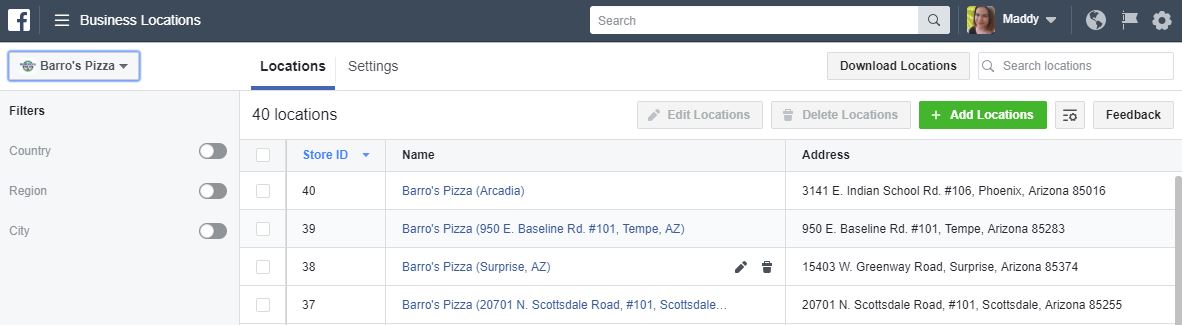
Explore what this looks like set up on our client, Barro’s Pizza.

Strategy Behind Facebook Locations
Facebook Location setup is worthwhile for a variety of reasons.
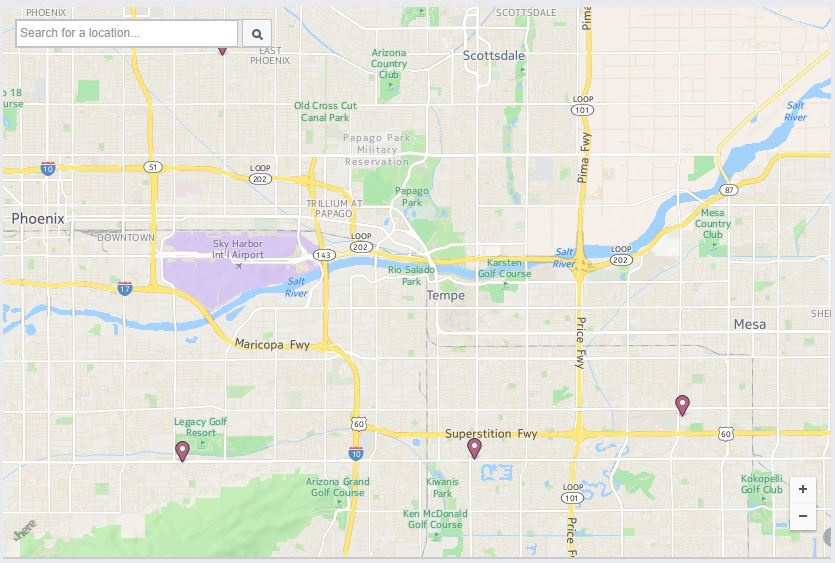
Show the Map of Nearest Store Locations on the Parent Page
- When you click the “Locations” tab on the left-hand side of the parent Page, a map will show up with all the location markers for the location Pages you set up.
- The map will auto-populate to where you’re located, showcasing the nearest location to you and your customers.
- You can also utilize Local Awareness Ads for goals like foot traffic, awareness and spreading the word about a local promotion.
Maintain a Uniform Brand Across All Locations on Facebook
- Profile photos and cover photos and videos on the parent Page will automatically transfer to new location Pages, including all future updates.
- All location Pages will clearly let visitors know they’re on an official location of the brand parent Page in the About section.
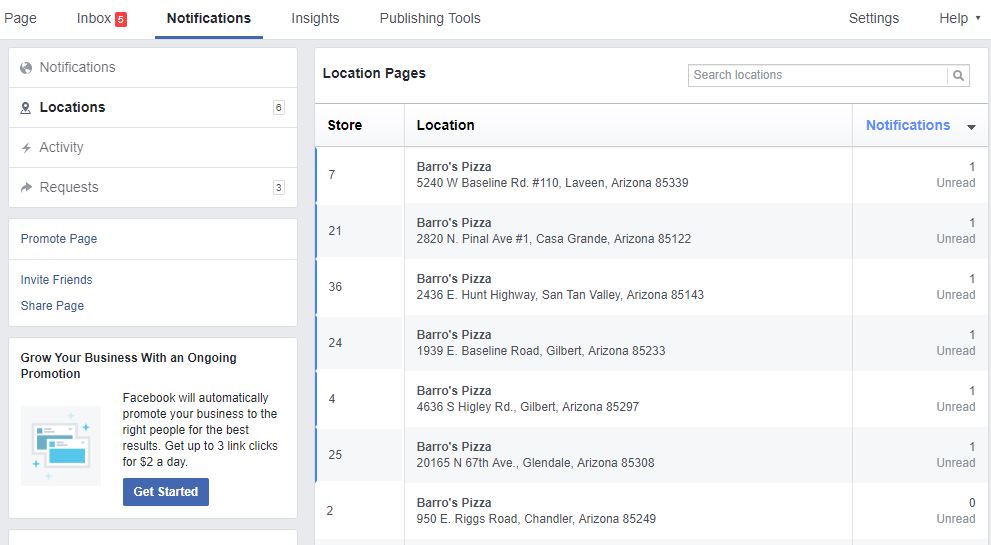
Easily Manage Multiple Locations
- When conducting your community management on Facebook, a Locations tab will show notifications to each of your location Pages. This makes monitoring easy, so you only need to visit the locations with an unread notification.
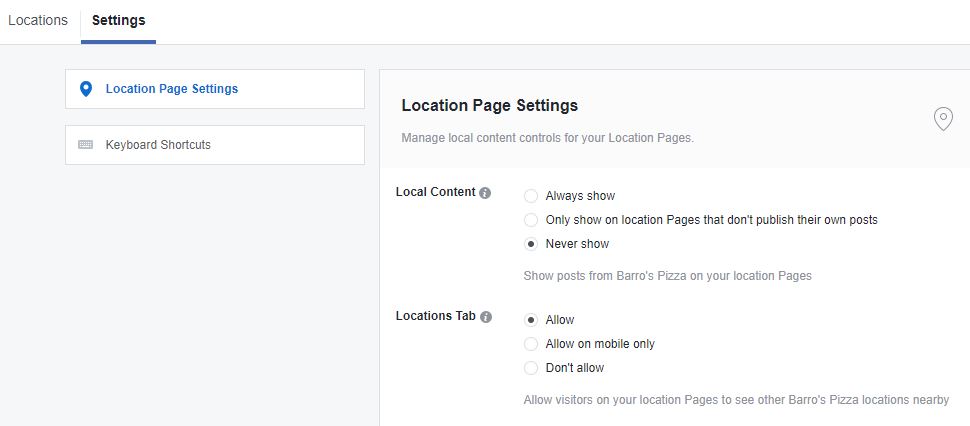
Show Main Page Content on Specific Locations with the Click of a Button
- If you would like to automatically show parent Page posts on your location Pages, you can easily do so.
- In your Business Locations Manager, click “Settings” at the top and toggle between options to show content on all location Pages or only on those location Pages that don’t publish their own posts.
- We like to keep our location pages set to “Never Show” so we focus on building the brand on the parent Page and let location-specific content shine on location Pages, but it is up to you.
Important Considerations
Note, at this time there’s no way to unlink a location Page from a parent Page once set up. You do have the option to delete the Page.
Location pages will still be autonomous Pages, meaning likes and reviews won’t also transfer to the parent Page.
Location Page Setup
Start setting up the Location Pages for your business in Business Manager. If you manage multiple businesses, toggle between them on the top left dropdown. To get started, you’ll need to create your parent Page from an existing Page that you manage. You may need to remove the address on your new parent Page to continue the process, but Facebook will prompt you to do so.
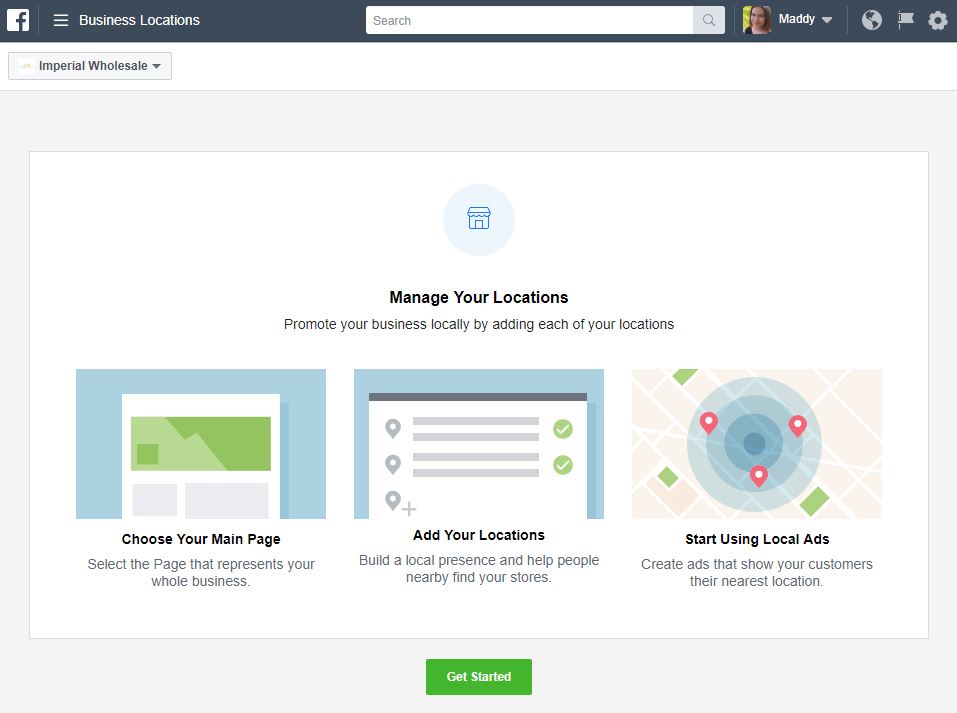
When you’re ready to begin adding your locations, click the green “Add Locations” button on your Business Locations dashboard. From the window that opens, you can Manually Add Locations, Upload Locations, or Migrate Locations from an Existing Page.
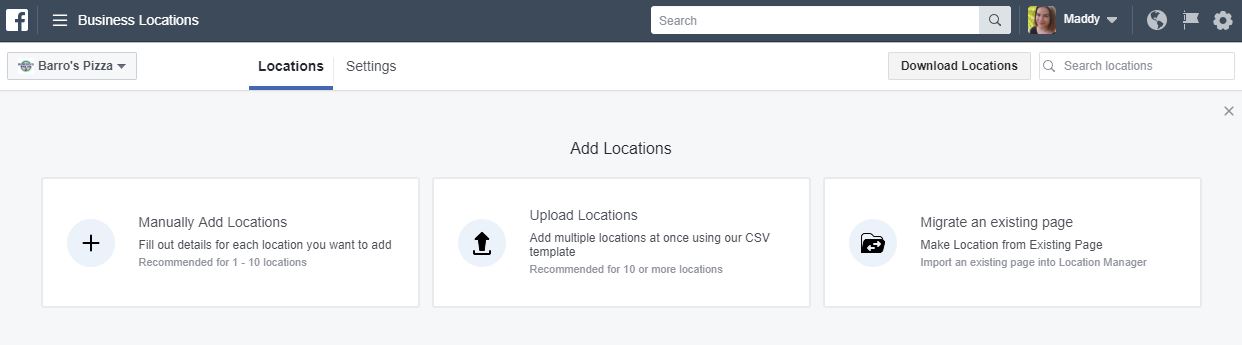
Manually Add New Locations
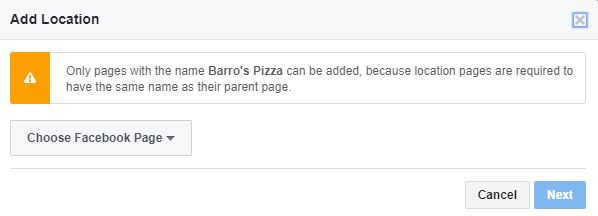
Choose the “Manually Add Locations” option when you have no Page created for a business location and want to create one from scratch. Begin filling in the details for the new Page you create. All locations must have the same name as the parent Page, so you’re unable to change the name. But, the Location Descriptor is the unique identifier for the Page and will show up in parenthesis next to the Page name. A good Location Descriptor is the city the location is in, or complex.

You can change any of the location information later if necessary in your Business Location Dashboard, or on the Page itself. Once the location Page is made, you’ll see it on your parent Page as a location.
Uploading New Locations
Choose the “Upload Locations” option when you have no Pages created for your business locations and you have a lot of locations. If you prefer to not create all new location Pages manually like above, Facebook allows you to upload a CSV file with all your business locations you’d like created. Just download their template, fill it in, and upload!
Migrate Existing Location Pages
Choose the “Migrate an existing page” option when you already have admin access to a Page that you’d like to turn into a location Page under your parent Page. The tricky part here is that location Pages must have the exact same name as their parent Page. Also, when you attempt to change a potential location Page name to match your parent Page, Facebook won’t allow you to make the change because you also manage a Page with that same name.
Here are two tricks I’ve learned to get around this name requirement if you’re running into trouble:
- Give admin access to another trusted profile on Facebook to change the name.
- By giving admin access to another person who doesn’t already manage your parent Page, they can easily request the name change from their profile.
- A person must be an admin on the Page for one week before they can request the name change, so plan accordingly.
- Be weary of creating or using a “dummy account” for this change, as Facebook is striking down on fake profiles and it could negatively impact your Page.
- If you’re trying to change the name drastically, like in the event of a rebrand, and Facebook isn’t allowing the change, follow the recommendations under “Problem: The names aren’t similar enough to merge” in the Facebook Page Merging section of this guide above.
- By giving admin access to another person who doesn’t already manage your parent Page, they can easily request the name change from their profile.
- Create a new location Page using the steps for manually adding a location, then merge the existing Page into this new location Page.
- Creating a new location Page will allow you to set up the location Page correctly with the same name, and then you don’t have to change the existing Page’s name perfectly with a Page name. Simply get it as close as possible to be able to merge with the new location Page.
- Follow our Page Merging section in this guide above for this process, keeping in mind that the only things you will keep from the existing Page once you merge into the new location Page are the likes and check-ins.
Conclusion
Having a clean and organized online presence makes things easier for both your customers and yourself. Cleaning up your Facebook presence will allow you to effectively manage your brand on this platform.